Dark Souls 2 Walkthrough: Majula
Welcome to Dark Souls 2, where it is up to you to free the land of Drangleic from an ancient curse. Of course, this isn’t going to be easy so Geek Insider is here to help!

Items:
Life gem x7 (use to receive 500 HP over 11 seconds)
Homeward Bone x8 (returns player to last used bonfire. Can be used to escape boss fights)
Lloyd’s Talisman x3 (prevents Estus recovery in limited area)
Divine Blessing x1 (fully restores HP and cure status effects)
Binoculars x1 (can be used to aim spells further)
Morning Star x1
Cleric’s Sacred Chime x1
Estus Flask x1 (greatly restores health when used. Refills when you rest at a bonfire)
Estus Flask shard x2 (use to improve Estus Flask)
Titanite Shard x4 (use to strengthen standard equipment)
Pharros Lockstone x2 (unlocks Pharros’ Contraptions in game)
Torch x3
Human Effigy x3
Radiant Life Gem x2 (restore moderate amount of health)
Poison Moss x3 (reduces poison build up, cures poison)
Ring of The Evil Eye x1 (absorbs HP from each enemy defeated)
Ash Knuckle Ring x1 (increases petrification resistance)
Great Heal x1 (Miracle-type spell to greatly restore health)
Token of Spite x1 (slightly increases your chance of being invaded)
Short Bow x1
Soul of a Nameless Soldier x1
Ring of Steel Protection x1 (boosts physical defense. Talk to Saulden after 100 deaths to obtain)
Crimson Parma x1
Soul of a Lost Undead x1
Broken Thief Sword x1
Soul Vessel x1 (Use to respec. One time use only per item)
Rusted Coin x1
Leaving Things Betwixt
As you enter this new location, take a left after the stones and go up the hill you find. It will take you to a cave, go in and find the room full of arches. Once you go through the last one, you’ll be on a path where you’ll meet Benhart. (If you kill him, you can get his sword.) In front of Benhart is a structure. Look left and you’ll find a corpse with three life gems and three homeward bones. Now enter the building. You’ll be in a round room with rooms on either side of you and a door in front that you can’t open since its switch is blocked by a statue of a woman.
The left room has a hollow that will burst through the gate. After you defeat it, collect three Lloyd’s talismans from its room. The room on the right also has a hollow.
You can’t un-petrify the woman until you get a fragrant branch of yore.
Fun fact: Once you can turn her back with the fragrant branch of yore, she’ll ask you for some clothes. This is your one and only chance to play Dark Souls dress up! Anything you give her will be lost forever but she’ll move to Majula so you can check her out anytime. She’s also a pyromancy trainer so go to her to upgrade your pyro gloves and buy useful items.
Since you can’t go any further, turn back and go down the hill. To the left, there is a corpse in front of a tree that will give you a divine blessing.
Before going to Majula, make sure to check out the view of the beautiful ocean to your right. Nope, just kidding. Look down and you’ll find a ledge you can drop to, followed by another ledge, and that’s where you’ll get a morning star, a cleric’s sacred chime, and binoculars!
Getting Your Estus Flask

Enter Majula by following the path through the large archway (if you’re on the ledge, that should lead you to the bonfire as well.) You’ll find a bonfire here. Look for the woman standing next to a tree. She’s the Emerald Herald. Talk to her and she’ll give you an estus flask. She’s the one you talk to when you want to level up and improve your estus flask. You can upgrade this flask right away by going to Majula’s well and attacking the rock on its ledge. This will cause the rock to fall, pulling a corpse up for your inspection. It will give you one estus flask shard.
Fun Fact: Killing the Emerald Herald will give you no souls and one aged feather (returns user to last bonfire used, infinite uses. Player keeps even in NG+). But this will make the game infinitely harder since you’ll never be able to level up.
Other Characters
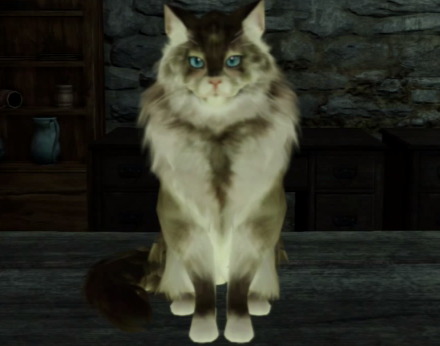
The characters you can find here are: Lenigrast the blacksmith (who is unable to get into his workshop until you can unlock it with Lenigrast’s key, which can be purchased from Melentia later in the Forest of Fallen Giants), the cat Shalquoir (who sells items), the armourer Maughlin, and Saulden. Other characters will move to Majula after you meet them.
Make sure to explore the houses in Majula for items. You can find a titanite shard in Maughlin’s house, on the second floor. By a rock by Lenigrast’s workshop is a corpse with a soul of a nameless soldier and three life gems. Once you open his workshop, check inside to get the short bow from his chest.
There is a great statue monument by the sea. Go up the stairs and find the crestfallen Saulden, who will give you information and back-story. He will invite you to join the Way of Blue Covenant to receive help from the Blue Sentinels. He’ll teach you the gesture “welcome” and give you directions to the Forest of Fallen Giants and Heide’s Tower of Flame.
If you go past Shalquoir’s house and up the cliff, you’ll find a large stone; the Victor’s Stone. It will ask you to join the covenant Company of Champions. Offer awestones here to increase rank. If you are a new player, it might not be a good idea to join this covenant because it makes all enemies stronger and won’t allow you to summon help. To the left of the stone is a corpse with five homeward bones.
Fun facts: Killing Maughlin will give you 900 souls and the Tseldora armor set. You can revive him again after 3 hours of game play. If you kill Lenigrast, he will drop his blacksmith’s hammer and 2000 souls. He is also revivable. Saulden drops the ring of steel protection when killed but is not revivable.
Best fact: You cannot kill Shalquoir. In fact, she won’t even attack you if you try. She’ll just mock you because even the creators of DS know cats are the best.

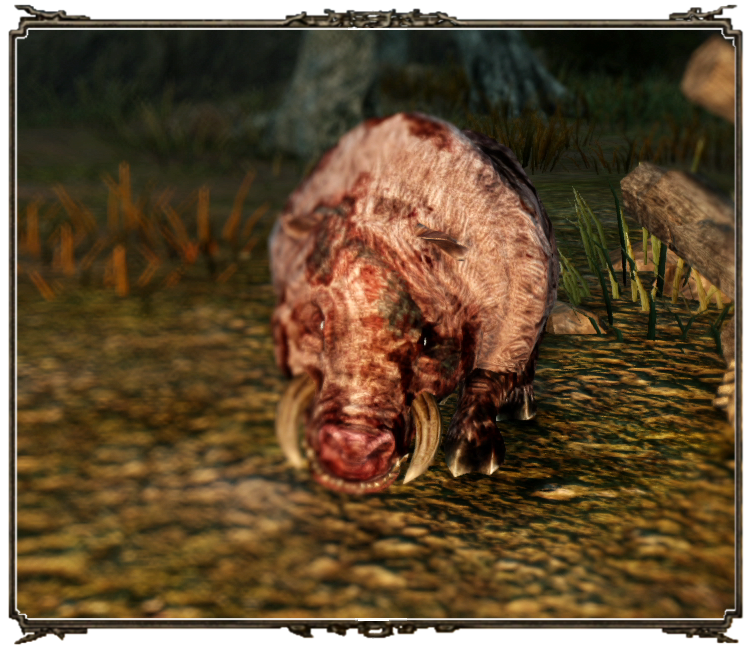
If you need more cracked red eye orbs, you can fight those little pigs by the corner of Maughlin’s house. However, these undead devourers might be small but they make up for it in immediate hostility and strength. Good luck in recovering your pride when they brutalize you.

The Mansion
You’ll find that one of the moldering mansions in Majula is locked. You can get the key from Cale the cartographer (Forest of Fallen Giants). When you enter, you’ll find two paths; to the right and forward. The hall straight in front of you will bring you to a small library where you can find your first Pharros’ lockstone.
The hall to the right of the front door will lead you to another fork. Upstairs has a second floor room and balcony. Inside the room is a chest with three titanite shards and three torches. If you go to the back of the mansion, you’ll find a large room with a map carved into the floor. A staircase will bring you to another room with a skeleton. It won’t revive when you kill it and drops a human effigy. Continue onto another smaller chamber to find a chest. The prize of this chest is random but has been reported to give divine blessing, soul vessel etc. Another skeleton in this room will yield an estus flask shard.
Outside Shalquoir’s house is a corpse with a life gem. Make sure to buy the silvercat ring from this sassy feline because it will allow you to survive higher falls with less damage so you can explore that big pit in the middle of Majula. As long as your VGR is 5, you can equip this ring and drop down the pit to the landing below. However, make sure you have 0.5% equip burden and NO forward momentum. It will still damage you quite a bit but not enough to kill you (using the Fall Control sorcery works as well).
The Pit

Now that you are in the pit on the first landing, descend careful to the next set of boards until you reach the bottom. You can land on the small beams but they’ll break and let you fall to your death so you probably shouldn’t.
The first set of boards has a corpse with a radiant life gem. The second is where you can find another Pharros’ lockstone. The third; poison moss.
From this set of boards, you have a choice of direction. If you jump down to the small ledge with torches, you can go to the Grave of Saints area or go down to another ledge via ladder. The ladder leads to a locked door; the entrance to The Gutter.
If you choose to continue jumping from board to board, down the well, you’ll get to a corpse with a ring of the evil eye. Now you’re at the bottom of the pit with just a tunnel leading out.
Crystal Lizard Alert: As you go forward, you’ll find a bridge with a gap in the middle. A crystal lizard will run off the bridge so be quick to catch it.
Jump across the gap and you’ll find a chest with the ash knuckle ring. There is a corpse with treasure on your left but you’ll not be able to reach it yet. You’ll find another pit which you can jump down in. However, you’ll land in water, which will slow your movements and a bunch of exploding small mummies will attack you. They have low health so they aren’t so tough but they can trigger an explosion that damages the surrounding area.
In this pit are two tunnels. The one with water covering the floor leads to a skeleton with great heal.
The other tunnel (with no water) leads to some scaffolding. Once you start down that first ladder, there is no going back up since the ladder is broken half way. Once you drop down from that first ladder, look left. There are two more ladders to descend. There’ll be a corpse with a human effigy on the scaffolding.
Climb back up the two ladders and go to the other set of ladders, which would have been on your right when you dropped down from the first ladder. Climb down the series of ladders. There will be a corpse with a radiant life gem near the bottom. Once you use the last ladder in this set, you cannot get back up again. A chest at the very bottom has a token of spite. The final tunnel will lead you to The Gutter.
Getting Around
To go to the Forest of Fallen Giants, stand at the bonfire, looking over the ocean. To your right will be a crumbling wall, on the side facing the sea will be a torch marking the entrance to a tunnel. Go down this tunnel and you’ll find a chest to the right with a rusted coin. Continue down the tunnel and you’ll find a fork. The right is a dead end, the left is a door. Pull the lever to the right to open the door. This will lead you into a cave with a bridge. Go over the bridge and you’ll reach a fork. To the left is a chest with a human effigy. The right leads to the Forest of Fallen Giants.
Heide’s Tower of Flame is to the left of the cliff where the Victor Stone is. There is a large stone arch with a staircase that will go down a tunnel. You’ll reach a circular room with a pillar in the center. The pillar will not work until you meet Licia of Lindeldt in Heide’s Tower of Flame. Once operational, it will open a path to Huntsman’s Copse. Go right down the hallway to a spiral staircase.
On the left, there will be a chest with a crimson parma. Continue down the stairs to reach a room with a door. Stay on the ledge to the left, there will be a pull chain to open the door. Go through the door and you’ll be in a waterway. Up the stairs here will be another pull chain if you need to go back.
Keep going and you’ll find a corpse with a soul of a lost undead and a broken thief sword. If you continue down the hall, you’ll reach the entrance to Heide’s Tower of Flame.

